Mortal Kombat X PC Download Free Full Version Compressed
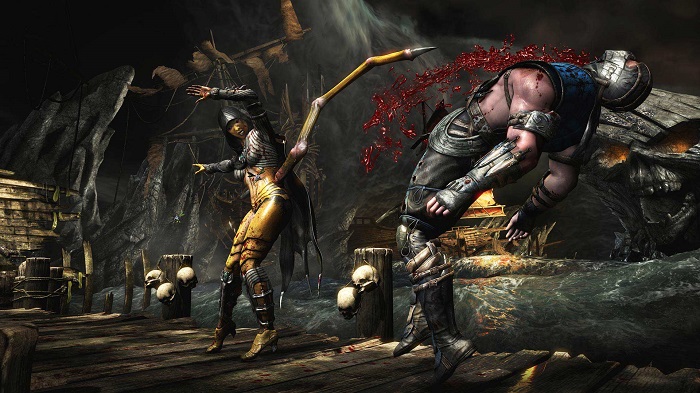
Mortal Kombat X PC is the latest in a long line of popular fighting games that began in 1992 in arcades. It came out in 2015 for the PC platform. It was made by NetherRealm Studios and put out by Warner Bros. Interactive Entertainment. Mortal Kombat X takes the franchise’ exaggerated violence and gore to new heights. Blood and gore effects, character models, and landscapes are more detailed thanks to a new graphics engine. Mortal Kombat’s trademark Fatality finishing moves are more gruesome than ever.
Various new mechanics in Mortal Kombat X PC download haven’t been seen before in the franchise. Players can team up with five other players using the game’s five-on-five team battle mode. Environments are now interactive with stage brutalities that allow you to use the stage to execute opponents creatively.
Mortal Kombat X for PC has all of the extra fighters, outfits, and stages that were made available for download before. The PC version is optimized well and has better graphics than the platform versions. Players on PC can change the controls to play the game how it was meant to be played. The extensive heritage of amazing fighting games that the Mortal Kombat series has built up over the years is contributed to by Mortal Kombat X’s revamped graphics engine, newly added game elements, and numerous bloody battles. The PC version offers the most complete Mortal Kombat experience possible.
Fluid, Strategic Combat Enhanced Mortal Kombat X PC
The highly compressed gameplay in Mortal Kombat X PC download keeps loyal to the series’ beginnings as an approachable, fast-paced, and brutally violent fighting game. The game employs a four-button attack scheme with front and back punches and kicks. Combined with directional inputs, a range of lethal combination attacks and special moves specific to each fighter are performed. The gameplay and combat flow smoothly at 60fps on PC, with responsive controls allowing expert players to pull off complex combos precisely.
In addition, Faction Wars—an online mode where players take on the role of clans like the Lin Kuei clan to gain points and unlock rewards—and environmental attacks are two new features included in Mortal Kombat X pc download utorrent. A bonus feature of the PC edition is its improved online net code, which guarantees lag-free online combat. A new stamina meter that reduces combo potential also adds strategy. PC gamers now experience the same intense and brutal close-quarters fighting that has made the Mortal Kombat franchise famous but with enhanced graphics and gameplay.
Characters and their Roles in Mortal Kombat X PC
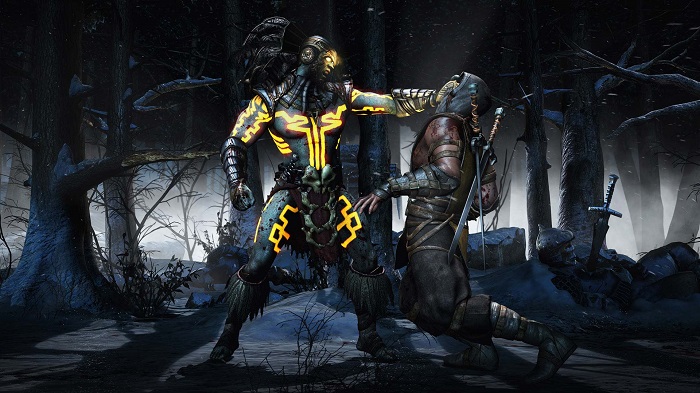
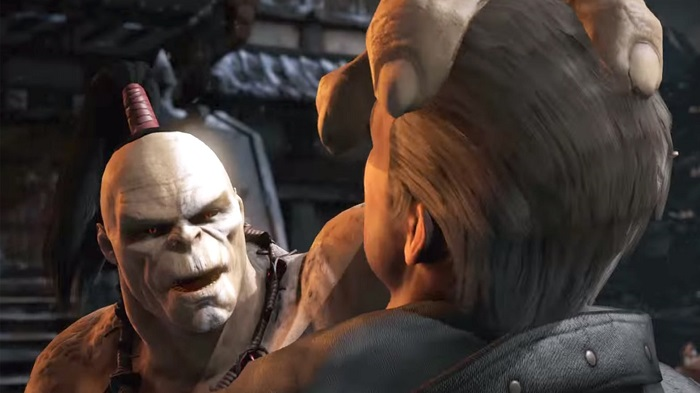
Both new characters and seasoned franchise stalwarts can be found in the Mortal Kombat X PC download-free roster. Scorpion and Sub-Zero return as bitter rivals, wielding hellfire and ice attacks. Classics like Raiden, Johnny Cage, and Sonya Blade also return with enhanced looks and new special moves. Newcomers include Cassie Cage, Johnny’s daughter who leads a special ops team, and sinister revenant Liu Kang.
Additional DLC characters, such as the horror icon Jason Voorhees, who uses machetes and savage strength against enemies, are also included in the PC version. Characters are one of the best aspects of Mortal Kombat, and X offers a wide variety of new and veteran combatants, each with a rich history and backstory revealed in the game’s story mode. As they chop, slice, and decimate opponents in graphic detail, players can select their favorite fighter and become proficient with their special skills.
Mods For Mortal Kombat X PC
Playing Mortal Kombat X PC patch fix on a personal computer, where mods can be installed, has many advantages. Players can personalize their experience with Mortal Kombat X by downloading one of the many available skins, textures, and other mods developed by the game’s active modding community. Some popular mods include new high-definition character skins that update the fighters’ looks, new arenas and backgrounds, and even mods that add completely new characters to the roster.
There are total conversion mods that put Mortal Kombat in different periods or imaginary worlds. Because the PC platform is so open, loyal MK fans can improve Mortal Kombat X PC setup download in any way they can. If people keep making and releasing mods, there will be an active group and many ways to play the game. This is another reason Mortal Kombat X does so well on PC.
Features and Updates For Mortal Kombat X
Tools abound in Mortal Kombat X PC game download that takes advantage of the PC’s capabilities. The game can run at 4K resolution and has uncapped framerates to make the fighting feel very smooth. There are a lot of graphic choices that let you change how things look. Support for controllers, fight sticks, and computer controls that can be changed give players options for how they want to play. Mortal Kombat X also has better online connectivity on PC, and the net code has been stabilized so that online fights don’t lag. The game stays balanced and free of bugs with updates and changes.
Significant content updates like new playable characters, costumes, Brutalities, and Fatalities have also been added over time to expand the game. The PC version contains all previously released DLC, such as the Kombat Packs, which add guest characters like the Alien Xenomorph, Leatherface, and the Predator. Mortal Kombat X PC game download torrent continues to be supported on PC with updates, giving it long-lasting value for players who want to engage in Bloody Kombat with an active community.
PROS
- Enhanced graphics and performance with 4K and uncapped framerates.
- Extensive graphical customization options allow for visual enhancements.
- Precise controls and support for various input devices like controllers and fight sticks.
- Includes all previously released DLC characters and content.
- The active modding community provides endless customization and replayability.
- Regular patches and updates keep the game balanced and expanding.
- Stellar online connectivity and matchmaking thanks to solid netcode.
CONS
- High levels of violence and gore may turn off some players.
- The story mode is a bit lackluster and short.
- Unlocking all cosmetic items requires grinding in the game’s Towers.
- Some fans were disappointed by the simplified gameplay mechanics.
- It can be difficult for new players to pick up and play.
Minimum System Requirements
- OS: 64-bit Windows 7/8/8.1/10
- Processor: Intel Core i5-750, 2.67 GHz | AMD Phenom II X4 965, 3.4 GHz
- Memory: 3 GB RAM
- Graphics: NVIDIA GeForce GTX 460 | AMD Radeon HD 5850
- DirectX: Version 11
- Hard Drive: 25 GB available space
Recommended System Requirements
- OS: 64-bit Windows 7/8/8.1/10
- Processor: Intel Core i7-3770, 3.4 GHz | AMD FX-8350, 4.0 GHz
- Memory: 8 GB RAM
- Graphics: NVIDIA GTX 660 | AMD Radeon HD 7950
- DirectX: Version 11
- Hard Drive: 40 GB available space